The name
The name is complete nonsense, but really, as long as it's search engine optimized, I don't think the name is too important. Regardless, the main reason I generally name things is so that I care about them more, so the less time and energy I spend thinking about the name, the more useful it usually ends up being.
The problem
This project came out of an interest in learning how to play isomorphic keyboard layouts and a personal wish to perform live electronic music. The primary product this is based on, the Novation Launchpad Mk II, is a square grid of 64 red/green LED backlit silicone dome keys. While this was a suitable setup for some cases, I often found myself needing more buttons, and didn't like using it as a pitched instrument. In addition, this time in my life was a pivotal point in my love for hexagons. In my research, I had discovered the sonome, a large (and expensive) isomorphic keyboard, and the C-thru Axis 49, a smaller (but still pretty expensive) isomorphic keyboard. I liked both of these, but my favorite thing about the Launchpad was the colored lights, as they not only provided visual feedback to the player, but also easily turned an audio-based performance into an audiovisual experience. Also, there's an entire industry built around putting lights with music, and I feel like that has to exist for some reason.
The solution
After seeing the viability of a hexagonally arranged set of keys, I sought to make a keyboard that was minimally expensive (below \$500 per unit, optimally below \$150 at large scales), RBG LED backlit, and user-reprogrammable. Other than these necessary elements, other design priorities included satisfying physical and visual response, ergonomics, and ease of manufacturing.
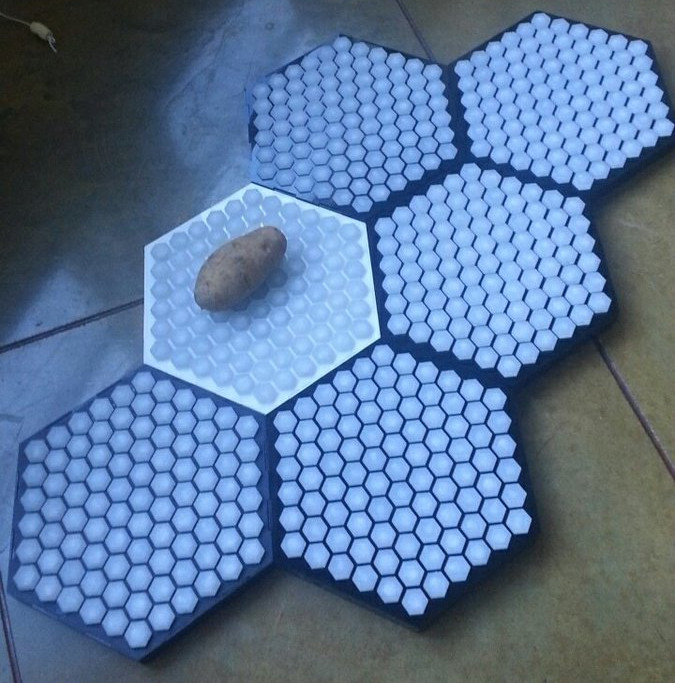
Potato for scale
Teensy
PJRC's Teensy seems ubiquitous in the hobbyist music technology scene nowadays, and I would attribute that to 2 factors. The first is that it's a very wholesome company that seems to only be able to do good things. The second is that the Teensy has supported MIDI over USB since the Teensy 2.0. My original prototype of the HXCSTR used the Arduino, which is a great teaching tool, but a pretty lackluster microcontroller. I think Arduino boards nowadays support MIDI, but it took them a loooong time to do it.
Keys
Inside the HXCSTR
Switches
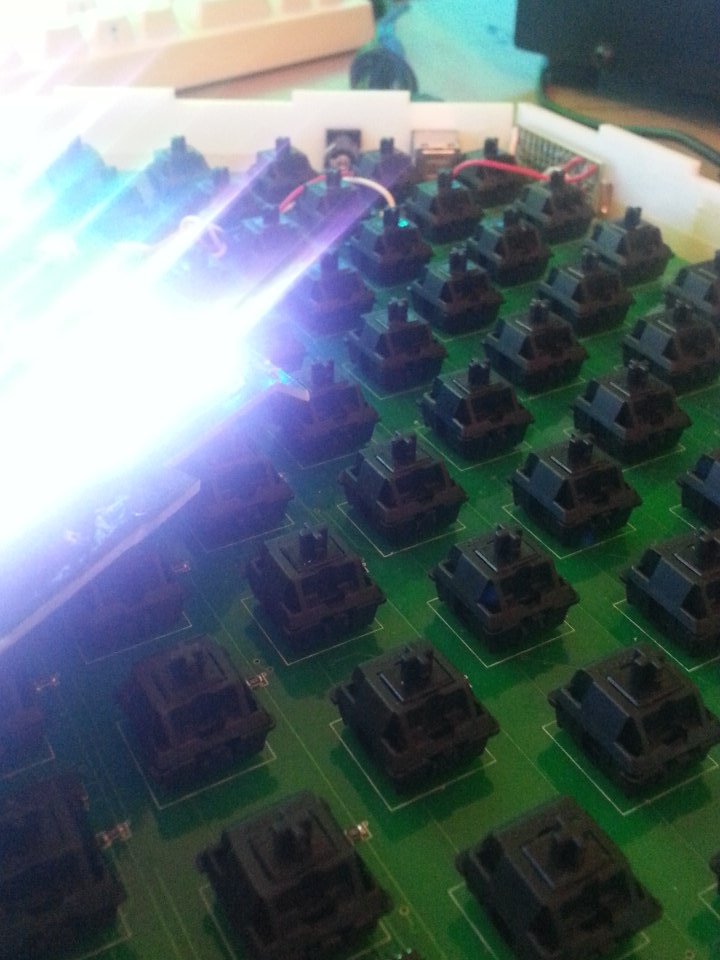
I don't remember how exactly I came across the Cherry MX line of switches, but I had a friend around that time of my life who was really into mechanical keyboards, and I think I learned about them from him. I liked the keys because they had a pretty long travel distance, which most MIDI controllers didn't (other than piano-style keyboards). I also felt like building the HXCSTR using them made them feel more premium, though I'm not sure how accurate that is. For anyone who knows about mechanical keyboard switches, my choice of the black variety of Cherry MXs may seem like a terrible idea, but there was a very very good reason for it: they're much cheaper than other Cherry switches. For anyone not familiar, the Cherry MX line of keyswitches come in many colors, and each color indicates a different style of switch. Some have a tactile bump, others have an audible click, and there are many different actuation forces for each. Black Cherry MX switches have the highest actuation force and no tactile or audible enhancements. While a loud MIDI keyboard would probably be distracting, I think the tactile bump would have been helpful. It didn't really matter which style I chose anyway, since they all have the same PCB footprint and I could replace them if I ever felt the need to.
Shift registers
Most mechanical keyboards and MIDI controllers read their switches
by using a diode matrix. The basic idea behind this is that you
can index by rows and columns rather than attach a pin to each
individual switch. This means for a 12x12 grid of switches, you
only need 24 pins from a microcontroller to read all the switches
rather than 144. A better solution (as far as I know), however,
is to use shift registers. Though the way it works is very very
different, a shift register is practically a digital multiplexer. You
can send a signal to it to tell it to read all of its inputs (8
inputs per shift register in my case), then use a simplified verison of
SPI
Velocity?
Unfortunately not. I saw a similar project at one point that also used Cherry MX switches, but they cut off the bottom of each switch to allow the stem to hit a second switch. I (foolishly) thought that velocity sensitivity wasn't worth cutting up 91 Cherry MX switches, designing and populating a whole extra PCB, and doubling the read time of each switch, so I went without velocity sensitivity. This project was less about being able to play expressively and more about learning the layout (and, to be honest, showing off).
Keycaps
The keycaps in my first prototype were laser cut, and I also experimented with resin casting a 3D printed part (a very smelly and sticky mistake), but once I got to the point where I could make these at larger volumes, I switched to injection molding. It was a huge hassle, but in the end, I think it was the right decision. The keycaps are made from polypropylene, and the diffusion is achieved by introducing a little bit of white pigment. I'm very satisfied with the appearance of the keycaps, but they add a lot of unnecessary weight, and the stems should have been round instead of rectangular.
Spacing
The key offset spacing was selected to be similar to that of a piano key. Additional spacing between keys is not something that existed in the Sonome or Axis-49, but I thought that it would be necessary in order to reduce friction between keys. It was not, and I definitely should not have included spacing between the keys. Hindsight is 20/20.
LEDs
In the first prototype, I hot-glued the LEDs to the keys. While that
was all fine and dandy, it was definitely not the optimal way to add
lights. In the final version, I ended up with two PCBs-- one for the
keys

WS2812B
If you've ever worked with large sets of RGB LEDs, you've probably heard the part number 'WS2812B' before. This LED is individually addressable, meaning each LED can be a different color, and it only requires one data pin, as opposed to the usual 2. The way it achieves this is by using a synchronous communication protocol. This protocol uses a varying pulse-width signal to send digital data serially through the chain of LEDs. What this essentially amounts to is an LED strip that's super cheap and very easy to send data to, but also limited in its data transmission rate. A synchronous protocol is (almost?) always limited to a single clock rate, and to ensure compatibility with a wide range of microcontrollers, that clock rate is generally not the highest it can be. As a comparison, the WS2812B's data rate is one LED per 30 microseconds, while the APA102, which has a clock signal, only takes a little over 2 microseconds per LED at its fastest. While a 28 microsecond difference is small by itself, these LEDs are generally used in large numbers, usually hundreds in a chain (in this project, there were 91 in a single serial chain). The more important difference in timing, however, is the internal PWM oscillator rate. To allow a range of colors, each component color of the LED is controlled by a PWM signal, which can be modified to make the color seem brighter or dimmer. This brightness is more or less controlled by turning the LED on and off very very quickly, and if the speed that it's turning on and off is too slow, it can lead to weird artifacts in videos and pictures, or worse, eye strain (not a confirmed medical effect, just me guessing). According to Tim, the WS2812B is about 430 Hz while the APA102 runs at 19200 Hz. I've never had any issue with image artefacts with APA102s. If you leave this blog post with one takeway, it should be that APA102s are much better than WS2812Bs.
Power
One of the most annoying hardware problems with the initial prototype was dealing with the 3.3v and 5v conversion. I also ended up switching my power jack component when I didn't need to, which was a bummer. The fact that it was a different height than the USB jack was a little annoying.
Layouts
Tonnetz/Harmonic Table
TODO
Wicki-Hayden
TODO
Janko
TODO
Drum Flowers
TODO

